Farmhouse Function: DIY Farm Table Projects is a comprehensive guide that provides step-by-step instructions on how to create your own farm tables. This guide is perfect for those who love the rustic, charming appeal of farmhouse-style furniture and want to incorporate it into their own homes. It covers everything from choosing the right materials, understanding the tools needed, and the actual process of building the table. Whether you’re a seasoned DIY enthusiast or a beginner, this guide offers a range of projects to suit different skill levels and design preferences.
Mastering DIY Farm Table Projects: Transforming Your Farmhouse Function
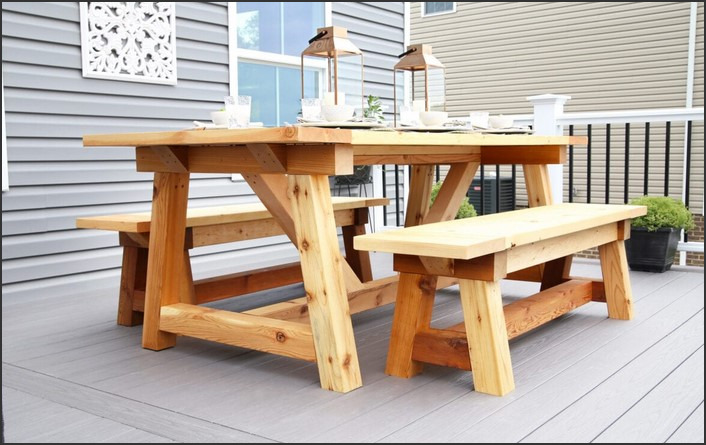
Farmhouse Function: DIY Farm Table Projects
Mastering DIY farm table projects can transform your farmhouse function, adding a rustic charm and practicality to your home. These tables, with their sturdy construction and timeless appeal, serve as the heart of the farmhouse kitchen, providing a space for family meals, social gatherings, and various household tasks. With a bit of skill and creativity, you can create your own farm table, customizing it to your specific needs and aesthetic preferences.
The first step in any DIY project is planning. Before you start building your farm table, you need to decide on its size, design, and the type of wood you’ll use. The size of the table should be determined by the space available in your kitchen or dining area, as well as the number of people you typically host. The design can range from a simple, traditional farm table to a more complex one with additional features like drawers or extensions. As for the wood, hardwoods like oak, maple, or walnut are recommended for their durability and beauty.
Once you’ve planned your farm table, the next step is gathering your materials and tools. You’ll need planks of your chosen wood, screws, wood glue, a saw, a drill, a sander, and possibly a router if you plan on adding decorative edges to your table. It’s also advisable to have a set of clamps on hand to hold the wood pieces together while you work.
The construction process begins with cutting the wood pieces to the correct sizes according to your design. This includes the tabletop, legs, and any additional parts like aprons or braces. After cutting, you’ll need to sand each piece to smooth out any rough edges and prepare the wood for staining or painting.
Next, you’ll assemble the table, starting with the base. This usually involves attaching the legs to the aprons using screws and wood glue, then adding the braces for extra stability. Once the base is assembled, you can attach the tabletop. This step requires careful alignment and clamping to ensure that the table is level and sturdy.
After the table is assembled, you can finish it with a stain or paint of your choice. This not only enhances the look of the table but also protects the wood from damage. It’s important to apply the finish evenly and allow it to dry completely before using the table.
Finally, remember that mastering DIY farm table projects is not just about following steps but also about learning and adapting. You might encounter challenges along the way, but these can be opportunities to improve your skills and come up with creative solutions. For instance, if you find that the table is not as stable as you’d like, you could add more braces or adjust the leg design. Or if you’re not satisfied with the finish, you could try a different product or technique.
In conclusion, DIY farm table projects can be a rewarding way to enhance your farmhouse function. They allow you to create a piece of furniture that is not only practical but also reflects your personal style and the character of your home. With careful planning, the right tools and materials, and a willingness to learn, you can build a farm table that will serve your family for generations to come.