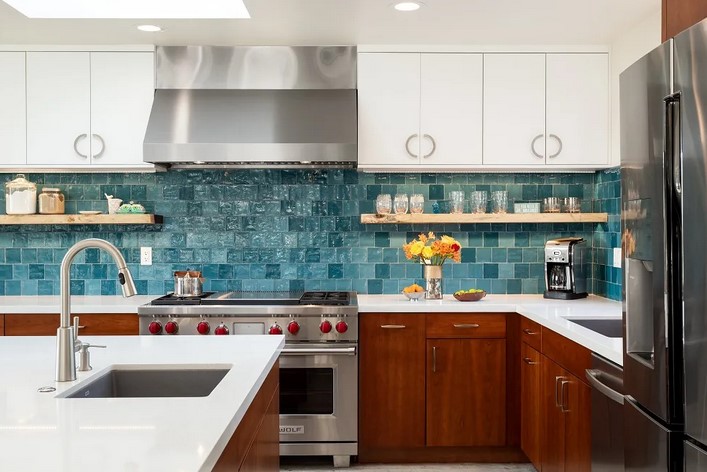
When it comes to updating your kitchen, a backsplash can make a world of difference. However, traditional tile installation can be a costly and time-consuming project. If you’re looking for an easy, affordable solution, Lowe’s backsplash peel and stick options might be just what you need. These peel-and-stick tiles are designed to be simple to install, with no grout or mortar required. Whether you’re a DIY beginner or someone looking to refresh your kitchen with minimal effort, this quick update is a great way to give your space a fresh, modern look. In this article, we will explore the benefits of using peel-and-stick backsplash tiles, offer installation tips, and show you how to create a stunning kitchen makeover using these versatile products.
Why Choose Lowe’s Peel and Stick Backsplash?
Peel-and-stick backsplashes have gained popularity in recent years due to their convenience, affordability, and ease of installation. If you’re looking for a fast kitchen update, Lowe’s backsplash peel and stick tiles offer an ideal solution for several reasons:
1. Time and Cost Efficiency
One of the biggest advantages of peel-and-stick backsplash tiles is that they save both time and money. Traditional tile installations often require professional help, specialized tools, and a lot of preparation, including setting the tiles and grouting them. Peel-and-stick tiles, on the other hand, are pre-applied with adhesive, so all you need to do is peel off the backing and stick them to the wall. This process eliminates the need for grouting, sealing, or waiting for drying times, making it a much quicker and more affordable option.
2. Easy to Install
Another benefit of Lowe’s backsplash peel and stick tiles is that they are designed for DIY enthusiasts. Whether you’re a first-time DIYer or an experienced renovator, these tiles are easy to work with. Most peel-and-stick tiles come in pre-measured sheets, which can be cut to fit your space with a utility knife or scissors. This ease of installation means you can complete the project over a weekend or in just a few hours, depending on the size of your kitchen.
3. Versatility and Style Options
Lowe’s offers a wide variety of peel-and-stick backsplash options that can suit nearly every kitchen style. From modern, sleek designs with metallic finishes to traditional and farmhouse-inspired styles, there is a design to match your aesthetic. You can find tiles made from different materials, such as vinyl, glass, or stone, each offering its own unique look and texture. With so many options available, you can easily find a backsplash that complements your kitchen’s color scheme and décor.
How to Install Lowe’s Peel and Stick Backsplash
Installing a Lowe’s backsplash peel and stick backsplash is a simple and straightforward process, but proper preparation is key to achieving a seamless, long-lasting finish. Here’s a step-by-step guide on how to install peel-and-stick backsplash tiles in your kitchen:
Materials You’ll Need:
- Peel-and-stick backsplash tiles from Lowe’s
- Measuring tape
- Utility knife or scissors
- Level
- Sponge and mild detergent
- Pencil or chalk
- Ruler or straight edge
Step-by-Step Installation:
- Prepare the Surface: Start by cleaning the wall where the backsplash will go. Use a sponge and mild detergent to remove dirt, grease, and grime, ensuring that the surface is smooth and dry before you begin. If the wall is textured, consider smoothing it out with a wall filler or primer.
- Measure and Mark: Use a measuring tape to determine how many tiles you’ll need to cover the area. Mark a starting point in the center of the wall or in the corner, depending on your design preference. This ensures that the tiles are aligned symmetrically. Draw a light pencil or chalk line to guide your tile placement.
- Cut Tiles to Fit: If necessary, use a utility knife or scissors to cut the peel-and-stick tiles to fit your space. If you’re working around outlets or corners, precise cutting is essential for a neat finish.
- Peel and Stick: Starting from your marked line, peel off the backing from the adhesive side of the tile and press it firmly against the wall. Use a level to ensure that each tile is placed evenly. Once the tile is in place, press down the edges to ensure full adhesion to the wall.
- Repeat the Process: Continue placing the tiles, making sure the edges align properly and there is no gap between tiles. If you need to make adjustments, peel the tile off gently and reposition it. Once all tiles are in place, press them down once more to secure them.
- Finish Edges and Corners: Once all tiles are installed, you may need to cut tiles for the edges or corners to create a finished look. Many peel-and-stick backsplash tiles come with corner pieces or trim that you can easily apply for a polished appearance.
- Clean and Maintain: After installation, give your new backsplash a quick wipe-down to remove any residue or marks from the installation process. To maintain the tiles, simply clean them with a damp cloth and mild detergent to keep them looking fresh.
Tips for a Seamless and Beautiful Finish
- Take Your Time: While the peel-and-stick process is quick, take your time with measuring, cutting, and positioning the tiles to ensure a flawless look. The more careful you are during the installation process, the better the end result will be.
- Use Grout Lines for Style: Some peel-and-stick tiles come with faux grout lines that mimic the look of traditional tile. If you prefer a grout-like finish, be sure to choose a product that features these lines. Alternatively, you can use grout in between tiles for added realism and texture.
- Add an Accent Border: To make your backsplash stand out, consider adding an accent border using contrasting tiles. For example, a strip of glass or metal tiles can break up the uniformity of the design and add visual interest.
- Consider a Full Wall Backsplash: If you have the space, consider extending the peel-and-stick backsplash across the entire wall, not just behind the sink or stove. This can create a dramatic effect and bring a sense of luxury to your kitchen.
Conclusion
A Lowe’s backsplash peel and stick installation is an ideal solution for anyone looking to refresh their kitchen without the hassle and expense of traditional tiling. The easy installation process, combined with the wide variety of stylish options, allows you to create a beautiful and functional backsplash that suits your taste and budget. Whether you’re a DIY enthusiast or someone who simply wants a quick upgrade, peel-and-stick backsplash tiles offer a fast and effective way to elevate your kitchen. With just a little time and effort, you can enjoy a stunning new kitchen look that is both affordable and long-lasting. So, why wait? Head over to Lowe’s today and start planning your peel-and-stick backsplash makeover!