Pine Perfection: Painting Knotty Pine is a comprehensive guide that provides detailed instructions and tips on how to paint knotty pine. This guide is designed to help both beginners and experienced painters achieve a flawless finish when painting this type of wood. It covers everything from the preparation of the surface, selection of the right paint and tools, to the actual painting process. The guide also offers advice on how to handle the unique challenges posed by the knots in the wood, ensuring a smooth and even finish.
Mastering the Art of Painting Knotty Pine for a Pine Perfection Look
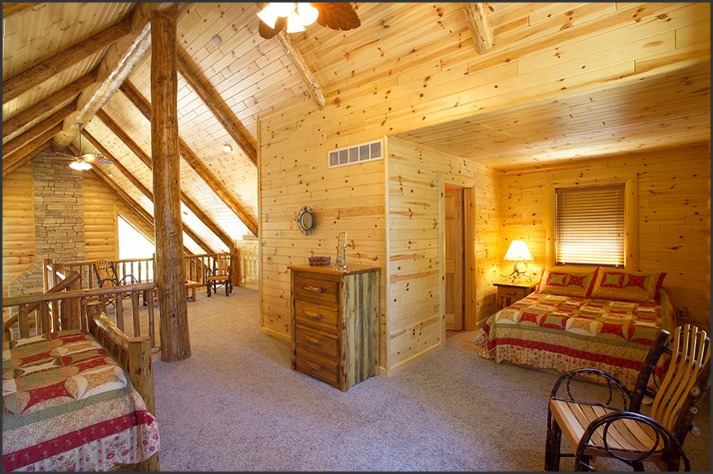
Knotty pine, with its distinctive grain and knot patterns, is a popular choice for rustic or country-style interiors. However, its natural yellowish hue may not always blend well with your desired color scheme. The solution? Painting knotty pine. This task, though seemingly straightforward, requires a certain level of mastery to achieve a pine perfection look.
The first step in painting knotty pine is to prepare the surface. This involves cleaning the wood to remove any dust, dirt, or grease that may interfere with the paint’s adhesion. A simple solution of warm water and mild detergent will suffice for this task. After cleaning, it’s crucial to let the wood dry thoroughly before proceeding to the next step.
Once the wood is clean and dry, the next step is to apply a primer. This is a critical step when painting knotty pine because the knots in the wood have a tendency to bleed through the paint over time. A stain-blocking primer will seal the knots and prevent this from happening. It’s recommended to apply two coats of primer, allowing each coat to dry fully before applying the next.
After the primer has dried, it’s time to apply the paint. When choosing paint, it’s important to consider the type of finish you want. A semi-gloss or satin finish is often recommended for knotty pine because it provides a smooth, durable surface that’s easy to clean. However, if you prefer a more rustic look, a flat or matte finish may be more suitable.
When painting, it’s best to use a high-quality brush or roller to ensure a smooth, even application. Start at the top and work your way down, applying the paint in long, even strokes. Be sure to cover all areas, including the knots, to ensure a uniform appearance.
Once the first coat of paint has dried, assess the coverage. If the knots are still visible or the color isn’t as vibrant as you’d like, a second coat may be necessary. Remember to allow each coat to dry fully before applying the next to prevent any streaks or smudges.
After the final coat of paint has dried, it’s time to apply a protective finish. This step is optional, but it can help to prolong the life of your paint job and protect the wood from damage. A clear polyurethane finish is a popular choice because it provides a durable, protective layer without altering the color of the paint.
In conclusion, painting knotty pine requires careful preparation, the right materials, and a bit of patience. However, with the right approach, you can transform your knotty pine into a beautiful, stylish feature that complements your interior design. Whether you’re aiming for a modern, sleek look or a rustic, country-style vibe, painting knotty pine can help you achieve your desired aesthetic. So, roll up your sleeves, grab your paintbrush, and get ready to master the art of painting knotty pine for a pine perfection look.